

Introduction
Imagine building a web app in minutes with AI—no coding expertise required. That’s the power of Bolt.new, a revolutionary AI tool for prototyping and deploying apps. But once your app is ready, how do you get it live? In this guide, you’ll learn how to deploy your Bolt.new app on a Hostinger VPS (Virtual Private Server) using Ubuntu, Cloud Panel, and essential dev tools like npm and PM2. Whether you’re a coding newbie or a seasoned developer, this walkthrough simplifies deployment so you can focus on innovation.
1. What is Bolt.new?
Bolt.new is an AI-powered web app builder that generates code based on your prompts. It’s perfect for:
- Prototyping ideas (e.g., SEO tools, e-commerce pages, social platforms).
- Learning coding through real-time error troubleshooting.
- Rapidly deploying MVPs (Minimum Viable Products).
Unlike no-code platforms, Bolt.new lets you edit the generated code, making it ideal for both beginners and pros.
2. Why Use Hostinger VPS for Bolt.new Apps?
Hostinger’s VPS offers:
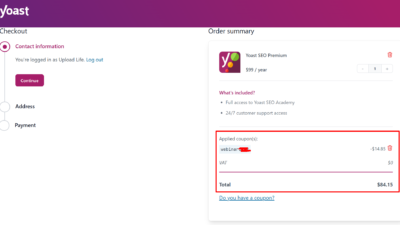
- Affordability: Plans start at just $5.99/month (use code VPS1 for 10% off).
- Ease of Use: Cloud Panel simplifies server management.
- Scalability: Upgrade resources as your app grows.
- Global Speed: SSD storage and 100 Mbps bandwidth ensure fast load times.
3. Prerequisites for Deployment
- A Bolt.new app (download as a ZIP file).
- A Hostinger VPS running Ubuntu 24.04.
- Basic familiarity with SSH and terminal commands.
4. Step 1: Download Your Bolt.new App
- In Bolt.new, click the Download button (top-right corner).
- Save the ZIP file to your computer.
5. Step 2: Set Up Hostinger VPS & Cloud Panel
- Buy a Hostinger VPS (select Ubuntu 24.04 with Cloud Panel during setup).
- Log into Cloud Panel:
- Go to
http://[Your-VPS-IP]/. - Use default credentials (username:
admin, password: set during VPS setup).
- Go to
- Create a Node.js Site:
- Navigate to Sites > Add Site > Node.js.
- Enter your domain name (or use a temporary hostname).
6. Step 3: Upload Files via Cloud Panel File Manager
- Open File Manager in Cloud Panel.
- Navigate to
htdocs/[your-domain-name]/. - Upload your Bolt.new ZIP file.
- Extract the ZIP and move files to the root directory (delete empty folders).
7. Step 4: Install Dependencies with npm
- Connect to your VPS via SSH (use Termius or PuTTY).
- Navigate to your project folder:
cd /home/admin/web/[your-domain-name]/public_html
- Install packages:
npm install
8. Step 5: Build and Run Your App with PM2
- Build the App:
npm run build(Check
package.jsonfor custom scripts likedevorstart.) - Install PM2 globally:
npm install pm2 -g
- Start your app:
pm2 start npm --name "my-bolt-app" -- run start
- Save the PM2 process:
pm2 save && pm2 startup
9. Step 6: Enable SSL for Security
- In Cloud Panel, go to SSL/TLS > Let’s Encrypt.
- Click Create Certificate to enable HTTPS.
10. Troubleshooting Common Issues
- “npm: command not found”: Install Node.js:
sudo apt install nodejs
- Blank Page After Deployment: Ensure files are in
public_html/, not subfolders. - PM2 Crashes: Check logs with
pm2 logs my-bolt-app.
11. Conclusion
Deploying your Bolt.new app on a Hostinger VPS is straightforward with Cloud Panel and PM2. Whether you’re launching a portfolio site, MVP, or AI tool, this setup ensures reliability and scalability.